Kwjcool321 (talk | contribs) (→Usage) |
(overall fixes) |
||
| Line 1: | Line 1: | ||
{{Unreleased|Experimental}} |
{{Unreleased|Experimental}} |
||
{{Stub}} |
{{Stub}} |
||
| − | {{Quote|Let there be light. |
+ | {{Quote|Let there be light.}} |
| − | ''' |
+ | '''Lights''' are organizational structures that illuminate an area. Each Light allows 2 [[power]] connections, making it possible to daisy-chain them. |
<div class="infobox-tabber"><tabber> |
<div class="infobox-tabber"><tabber> |
||
| − | + | Panel= |
|
{{Infobox simple |
{{Infobox simple |
||
| name = Lights Control Panel |
| name = Lights Control Panel |
||
| Line 28: | Line 28: | ||
}} |
}} |
||
|-| |
|-| |
||
| + | Wall= |
||
| − | Wall Mounted Flood Light= |
||
{{Infobox simple |
{{Infobox simple |
||
| name = Wall Mounted Flood Light |
| name = Wall Mounted Flood Light |
||
| Line 50: | Line 50: | ||
}} |
}} |
||
|-| |
|-| |
||
| − | Street |
+ | Street= |
{{Infobox simple |
{{Infobox simple |
||
| name = Street Light |
| name = Street Light |
||
| Line 72: | Line 72: | ||
}} |
}} |
||
|-| |
|-| |
||
| − | + | Tower= |
|
{{Infobox simple |
{{Infobox simple |
||
| name = Flood Light Tower |
| name = Flood Light Tower |
||
| Line 124: | Line 124: | ||
{{shopunlock|2||Lights Control Panel}} |
{{shopunlock|2||Lights Control Panel}} |
||
{{shopunlock|3||Ceiling Light}} |
{{shopunlock|3||Ceiling Light}} |
||
| + | |||
| ⚫ | |||
| ⚫ | When placing down Lights, a holographic arrow will be shown at the base of the light to indicate the light direction. The angle of Flood Lights can be tilted: while building, the first click places the light down and the 2nd click confirms the build. Before the 2nd click, the angle can be adjusted with {{mouse|middle}}. The adjustable angles are between 30 degrees to 90 degrees (directly down) in intervals of 5 degrees. |
||
| + | |||
| ⚫ | The Lights Control Panel has no collision and can be either floor-mounted or wall-mounted. The Wall Mounted Flood Light has no collision. The Flood Light Tower has a much smaller collision than it seems: only 4 x 4 m, and its light panel has no collision at all. The Street Light has collision only at its vertical pole. |
||
== Usage == |
== Usage == |
||
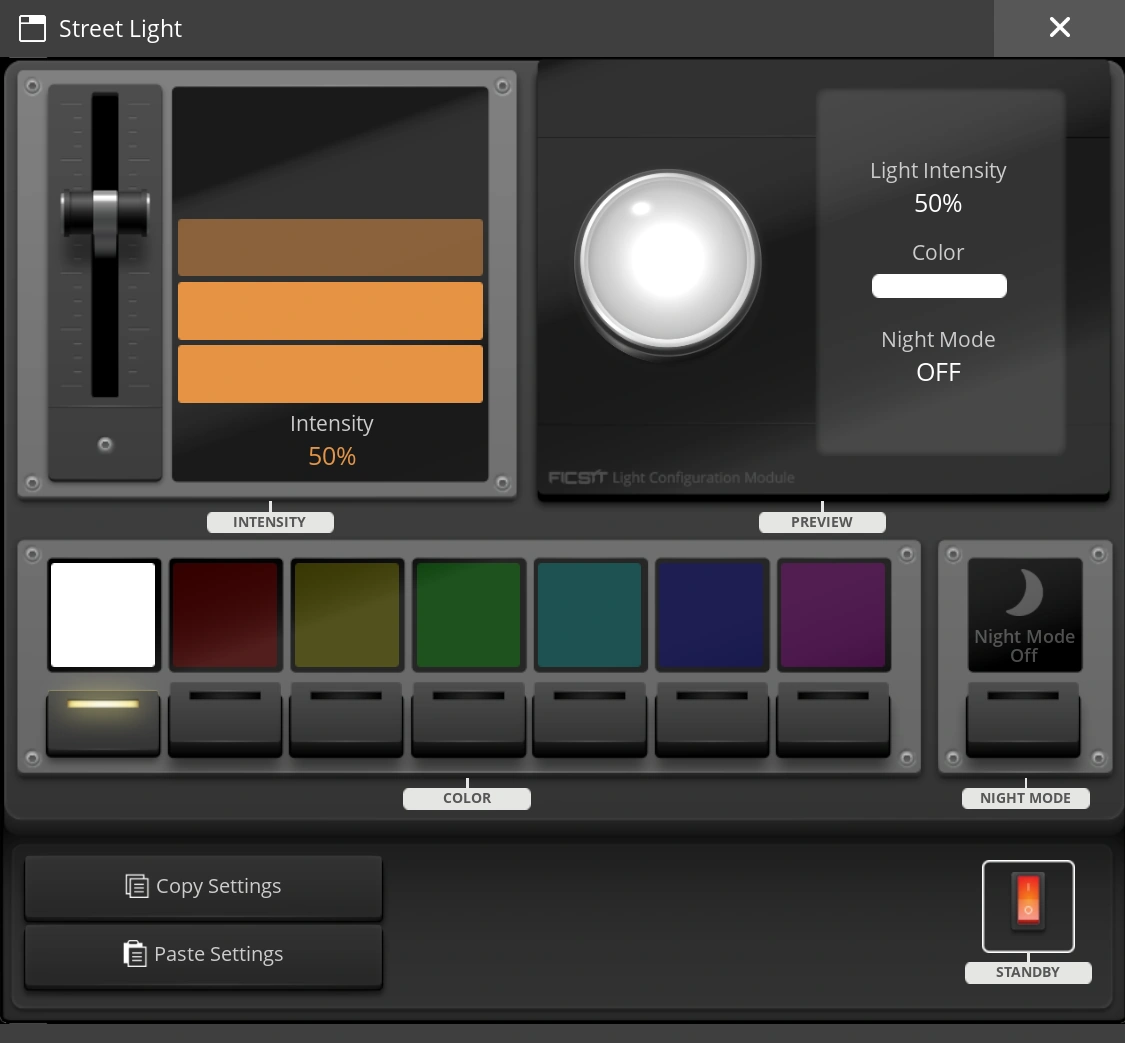
| − | + | Interacting {{Key|E}} with a Lights Control Panel, Street Light or Flood Light Tower will bring up a menu where light settings can be changed. Connecting multiple lights through a Light Control Panel changes the settings of all connected lights, should the connection not be interrupted by any other Light Control Panel. Ceiling Lights and Wall Mounted Flood Lights can only be controlled via a Light Control Panel. |
|
Light settings: |
Light settings: |
||
* 7 color slots, each can be customized similar to a [[Color Gun]]. |
* 7 color slots, each can be customized similar to a [[Color Gun]]. |
||
* Light intensity, or brightness. |
* Light intensity, or brightness. |
||
| − | * Night mode, |
+ | * Night mode, making the light(s) only turn on during nighttime. If it already is night when toggling this setting, it will not update until the next night. |
| + | As with factory buildings, the configuration can be copied and pasted. Lights routed through a Lights Control Panel can be easily turned off by flicking its standby switch. |
||
| − | There are buttons for copy and paste the light settings. At the bottom right is the standby switch for turning on / off manually. |
||
| − | |||
| ⚫ | |||
| ⚫ | When placing down Lights, a holographic arrow will be shown at the base of the light to indicate the light direction. The angle of Flood Lights can be tilted: while building, the first click places the light down and the 2nd click confirms the build. Before the 2nd click, |
||
| − | |||
| ⚫ | The Lights Control Panel has no collision and can be either floor-mounted or wall-mounted. The Wall Mounted Flood Light has no collision. The Flood Light Tower has a much smaller collision than it seems: only 4 x 4 m, and its light panel has no collision at all. The Street Light has collision only at its vertical pole. |
||
| + | == Gallery == |
||
| − | [[File:Light Menu.png|thumb|The menu in which you can edit the light]] |
||
| + | <gallery> |
||
| + | Light Menu.png|The light edit menu |
||
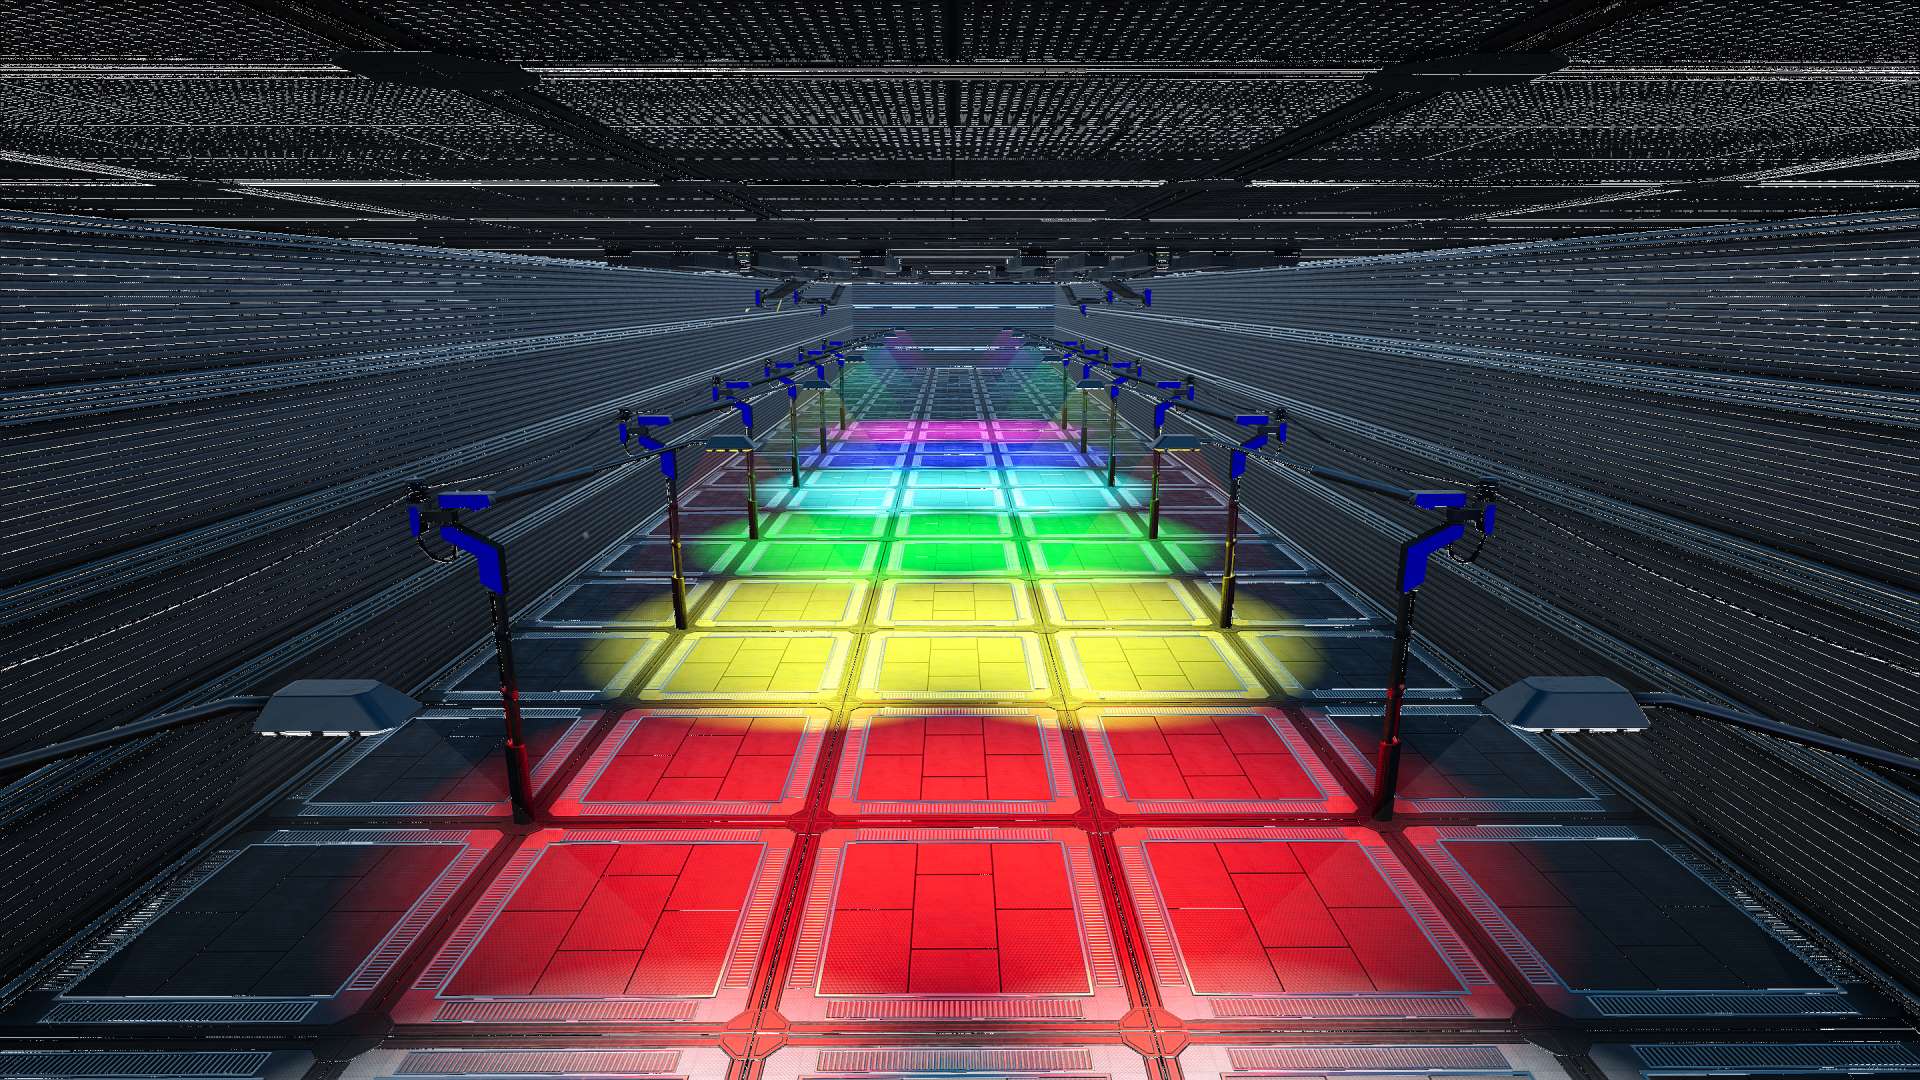
| + | Colored Lights.jpg|Setup of overlapping colored lights |
||
| + | </gallery> |
||
== History == |
== History == |
||
Revision as of 08:57, 22 March 2021
 |
Experimental branch content This article or section is about an item or feature that is currently only available in the experimental branch of the game. Its details may change by the time it reaches the stable branch.
|
| This article is a stub. You can help Satisfactory Wiki by expanding it. |
| “ | Let there be light. | „ |
Lights are organizational structures that illuminate an area. Each Light allows 2 power connections, making it possible to daisy-chain them.
Obtaining
Unlocking

Construction
When placing down Lights, a holographic arrow will be shown at the base of the light to indicate the light direction. The angle of Flood Lights can be tilted: while building, the first click places the light down and the 2nd click confirms the build. Before the 2nd click, the angle can be adjusted with ![]() . The adjustable angles are between 30 degrees to 90 degrees (directly down) in intervals of 5 degrees.
. The adjustable angles are between 30 degrees to 90 degrees (directly down) in intervals of 5 degrees.
The Lights Control Panel has no collision and can be either floor-mounted or wall-mounted. The Wall Mounted Flood Light has no collision. The Flood Light Tower has a much smaller collision than it seems: only 4 x 4 m, and its light panel has no collision at all. The Street Light has collision only at its vertical pole.
Usage
Interacting E with a Lights Control Panel, Street Light or Flood Light Tower will bring up a menu where light settings can be changed. Connecting multiple lights through a Light Control Panel changes the settings of all connected lights, should the connection not be interrupted by any other Light Control Panel. Ceiling Lights and Wall Mounted Flood Lights can only be controlled via a Light Control Panel.
Light settings:
- 7 color slots, each can be customized similar to a Color Gun.
- Light intensity, or brightness.
- Night mode, making the light(s) only turn on during nighttime. If it already is night when toggling this setting, it will not update until the next night.
As with factory buildings, the configuration can be copied and pasted. Lights routed through a Lights Control Panel can be easily turned off by flicking its standby switch.
Gallery

The light edit menu
Setup of overlapping colored lights
History
- Patch 0.4.0.0: Introduced